Showing posts with label Apps for Rooted devices. Show all posts

Tuesday, February 5, 2019

4k60 Camera Mod for Samsung Exynos devices


I have come across this mod recently and found to be very interesting. The mod makes the Exynos based Samsung devices to use their full potential of the hardware to capture some of the best videos and photos. This mod can be installed only on Stock based Samsung Experience ROMs with Magisk. All the credit goes to the developer Cvolton. 


Videos:
The Galaxy S7 Edge stock camera allows to take 4K videos at 30 fps, FHD at 60 fps max whereas this mod allows to capture 4K UHD resolution videos at 60 fps, FHD videos at even 120 and 240 fps and even more. Some of the UHFR resolutions may not work in some devices.


Resolutions available for Videos


The additional Mod Settings can be found in the camera settings as shown in the below screenshot. Allows user to change the Video encoders, Audio bitrates and Video bitrates as they require.


Type of Video Encoders available are H.263, H.264, MPEG-4 Visual and H.265


Audio bit rates ranges from 64 Kbps to 320 Kbps


Video bitrate ranges from 500 Kbps to whooping 200 Mbps


Photos:
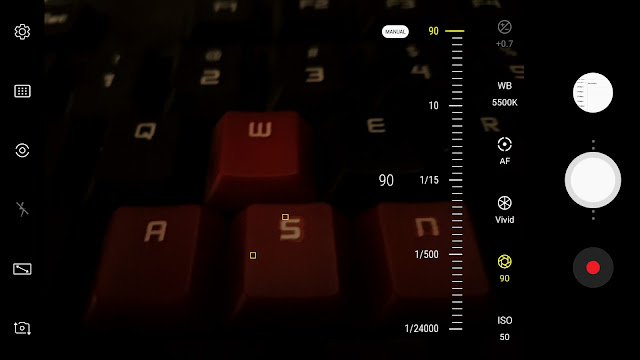
The interesting part in the photos is that it's Pro mode. This gives an excellent improvement for the users who use this mode more frequently. 

  • The limit of the ISO is increased to 6400.
  • Shutter speed is scaled up to 90 seconds for long exposure shots (It is 2 or 4 seconds in the stock camera)
  • Shutter speed is also lowered to 1/24000 seconds (It is 1/30 seconds in the stock camera)
  • Unlocked Pro mode in the front cam


Requirements/Compatibility:
  • Magisk 17+
  • Samsung Experience stock based ROM
  • Supported devices are Samsung Galaxy S7 & S7 Edge, Galaxy S8 and S8+, Galaxy Note 8
  • Devices with different sensor resolution than 4032x3024 require a manual modification of a .xml file

Installation instructions:
  • Install the zip via Magisk --> Downloads and search for 'Samsung 4k60 Camera Mod'
  • Clear the ShootingModeProvider's data
  • Install the zip based on the Hardware of the device and not on the type of ROM running


How to Install Magisk?
Click here and follow the instructions to Install Magisk on your Samsung Devices


Saturday, January 5, 2019

Install Magisk (The System-less Root) in Galaxy S7/S7 Edge Exynos


Note: Take a complete backup of your data. There may be a chance to erase internal memory if required. This will void warranty. I am not responsible to any harm done to your device. You should know what you are doing. Follow the steps carefully. 

Get the TWRP for Galaxy S7 (Exynos) here
Get the TWRP for Galaxy S7 Edge (Exynos) here
Get latest Magisk zip here
Get latest Odin here
Get Encryption Disabler here

1) Go to Settings and enable the Developer Options (Keep tapping on the ‘Build number’ and you will find the Developer Options visible under Settings). Now enable “USB Debugging” and "OEM unlocking" if available

2) Transfer the Magisk zip file, TWRP tar file and the Encryption Disabler zip file into the SD card

3) Shut down your phone and hold Power button + Home button + Volume down simultaneously until you see some text on the screen. Now press “Volume up” button to enter the phone into Download Mode

4) Connect the phone into the PC USB port directly via USB cable. Avoid USB hubs

5) Open Odin and load the TWRP tar file (****.img.tar) in the AP section. Disable 'Auto Reboot'. Hit 'Start' button 

6) Once you see ‘Done’ or ‘Success’ in Odin, hold the Power + Home + Volume down buttons and once it leaves the Download Mode, change from volume down to volume up while holding other buttons

7) Press/Select "keep system read only" in order to Keep the Safety Net

8) In case you can’t read the internal storage of the phone (check that by pressing on install and checking internal storage), go to format-->format data and type yes. It explains there that, by doing so, you will remove encryption. This will erase the internal memory data.

9) Now tap on ‘Install’ and flash the Encryption Disabler zip file and then the Magisk zip file.

10) Clear Cache/Dalvik if requested and Reboot. Done!!!

Sunday, November 18, 2018

Systemless Root for Samsung Galaxy phones using Magisk

Systemless Root for Samsung Galaxy phones using Magisk


Brief Intro about Magisk:
Magic Mask is know as Magisk. “Systemless” root can be achieved by Magisk. It is a way to modify the system without actually modifying it. Modifications are done in a duplicate boot partition instead of modifying the real system files. Modifications are undetected by SafetyNet since the original files remains unchanged. This is an alternate for SuperSU. 

Let's get started 👍

Prerequisites:

  • Read this post at least twice before starting. You agree that you are performing this at your own risk.Warranty may be void. 
  • Take a full backup of your phone. Need to do a factory reset during the process.
  • Stock boot image file of your device
  • Magisk Manager
  • ODIN

This method is applicable for all Android phones and I am taking Samsung Galaxy S7 Edge as an example to show the demo. There are many ways available to root a phone but the way we are gonna achieve root does not require custom recovery. In other words, flashing Masigk without root and does not require a custom recovery. 

1. Get the stock boot image file for your device. I am taking Galaxy S7 Edge as an example here. Download the latest firmware from sammobile or updato. Extract the file and you will get some files as shown in the below image.


2. The boot image file is contained in the file starting with AP_G935F........... So extract this file and you get boot.img as one of the files. Recent firmware files from Samsung uses a new compression method known as lz4 so if you end up some thing like boot.img.lz4 then you need to extract the lz4 file using 7zip (get 7zip from here). Now finally you will have boot.img. 

Get the Stock boot image file for Samsung Galaxy S7 edge here or here

3. Now download the Magisk Manager. Get it here and install it in your device. 

4. Move the extracted boot.img file to your SD card

5. Open Magisk Manager and go to Settings -> Update Settings -> Patched Boot Output Format, and select .img.tar

6. Go to the homepage of the Magisk and select Install -> INSTALL -> Patch Boot Image File -> Select your stock boot image file(boot.img) from the SD card

7. Magisk Manager will now patch the boot image and stores in Internal Storage/Download/patched_boot.img.tar

8. Copy this patched_boot.img.tar file to your desktop

9. Download the latest ODIN from here

10. Put the phone in Download mode(For S7 Edge -> Press Home key + Power button + Volume down simultaneously and continue to Download mode) Connect the phone to the PC via USB cable and open ODIN

11. Your phone should be detected by ODIN. Click the AP button and select the patched_boot.img.tar file from your desktop. Hit 'Start'. The flashing will be done in seconds. Below image is for reference.


12. Your phone will now reboot and asks you to to do a reset. After Resetting, you are Done. 

13. Go to the app drawer and you can find the Magisk Manager. Open it and follow the on screen instructions which requests you to Install Magisk. 

14. Now your phone is rooted systemless-ly. You will still be eligible to receive official OTA updates. 

Note: You may receive a warning message by 'Device Security' as shown in the below screenshot. Do not restart phone from here. Ignore it. 


Monday, May 8, 2017

Battery Charge Limit app

Now we have an app which stops charging once it reaches 80%. Pretty good one to use to have a good battery life.

Prerequisite:
This app required a rooted phone running android 4.4 or higher

Instructions:
  1. Install the app from here
  2. Enable the limit in the app.
  3. Change the charging limit as you desire. Default and recommended value is 80.
  4. The app starts to work only when a charger is connected and stops working once the charger is unplugged. So this apps works only when the phone is connected to a charger and does not affect the battery.
  5. If the phone is not charging after disabling the limit then uninstall the app and reboot the device. After reboot the charging should work normal.
  6. Before uninstalling the app, disable the limit and then uninstall.

Friday, May 27, 2016

'Xposed one tap video download' to download videos from most of the websites


Want to download the videos that you play using the browser? If yes, then this is the simplest way if your phone is rooted.
One Tap Video Download  is an Xposed Module which enables user to download videos from most of the websites or select video player to play video from most of the websites.

Download it from the play store or download from Xposed app itself.
 
Requirements:
> Android 4.0+ and ROOT
> Xposed Framework
 
Install Instructions:
 
> Install Xposed Installer
> Install Xposed Framework (from the Xposed Installer app)
> Install One Tap Video Download from HERE
> Activate the module in Xposed Installer app and reboot your device to see the changes
> Configure the application as you like.
>For other applications like Facebook, Vine etc., please scroll down and install those application specific modules.


Tuesday, May 24, 2016

Move OBB files to SD card and free up the Internal Storage


Are the Games in your phone occupying huge amount of memory in the Internal Storage?.  Now move the Obb files from your internal storage to SD card and the game still works with the help of this awesome app ‘Obb on SD’.

Note: You need Root and Xposed for this module to work.

Module ‘Obb on SD’ attempts to make it seamless - just enable module, reboot and move Obbs to SD card (move to the same folder: Android/obb) - that's it. No need to enter any path or whitelist/blacklist any app.

Do you want to only move Obb from Grand Theft Auto? Then only move that Obb to the SD card. ‘Obb on SD’ module will detect Grand Theft Auto Obb on SD card and enable hooks only for this single game. As simple as that. This can free up GBs of space from Internal Storage.


Download: Xposed Module Repository or Play Store

Tuesday, March 10, 2015

Flashify App - Install / Backup / Restore Custom Recoveries, Kernels


There are many ways to flash Custom recoveries as follows,

  > Odin
  > Install zip file from recovery
  > Flashing recovery image through apps like Flashify, GooManager, ROM Installer, etc


Steps to flash recovery using Flashify app. The easiest way.

1. Device should be rooted
2. Download Flashify app from Play Store
3. Open Flashify app and Grant root access
4. Select the 'Recovery image' option under 'Flash' tab


5. A pop up window shows the available recoveries TWRP, CWM and Philz. Select the desired option.


6. A pop up window loads all the versions of the selected recovery based on your phone's model.

TWRP recovery versions

CWM recovery versions


7. Select the latest version or the version you prefer. Downloading of the recovery starts.
8. Go ahead and start the installation once the download is completed
9. Reboot the device. Done!

Kernels and Recoveries can be backed up and restored very easily with just a click