


This guide is only applicable for 4G Samsung phones purchased outside India.
Those who have bought their phones overseas are now struggling to use Reliance Jio because they do not support VoLTE. And this guide will help you in making the Samsung phone to support VoLTE and Samsung Pay as well.
Before trying out this guide please make sure you have a 4G Samsung phone.
Let’s get started. 👍
1. Ensure the phone is charged over 60%. This process will wipe your entire data on the phone.
2. Check the model number of your Samsung phone.
Settings --> About --> Model Number
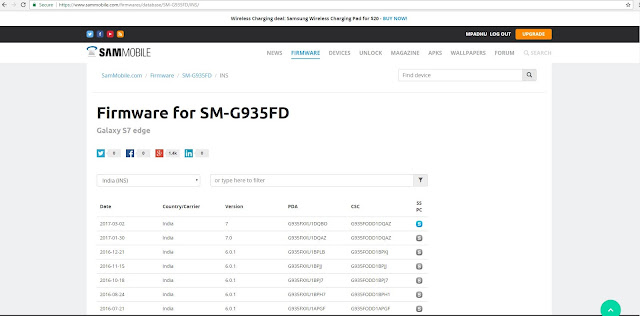
3. Go to the site https://www.sammobile.com/firmwares/ and insert your model number in the search bar and it will show all the available firmware versions for your model along with the country names. Check for INS or INU which indicates the Indian firmware. Download the latest Indian firmware for your model.
Below is the search result for the Samsung Galaxy S7 Edge (SM-G935FD) filtered by the Country India (INS). Click on the latest version and download the file.
4. Download the latest ODIN from http://odindownload.com/ or Here
5. Extract or Unzip the firmware file into a folder. Avoid using winrar as it can cause errors. Use 7zip instead.
6. Run/Open ODIN as Administrator
7. Put the phone in download mode. Shutdown your phone. Press Power + Home + Volume down. A screen appears asking you whether to continue or not. Press Volume up to continue. Connect the phone to the computer via a good USB cable. The ODIN should show the it has detected your phone.
8. From the extracted firmware put the below files in ODIN. Click on the buttons BL, AP, CP, CSC one by one and choose the respective files. The file to be chosen for BL will start with file name BL. The file to go for AP will start with the file name AP and so on as shown in the following image.
BL
AP
CP
CSC

9. Check the below options. (for this select Options tab).
F.reset time
Auto reboot
10. Here we are installing Indian country firmware from other country’s firmware so we need to change the System partition size. To do this select PIT file and the check the below checkbox. Note: PIT file is not required nowadays as it is already built-in the CSC file. So just check the below option as shown in the following image.
Re-partition

Note: If you are installing a multi CSC firmware, and your existing CSC is in that firmware, then DO NOT select Re-partition.
You can check if your firmware is Multi-CSC by installing this app (Phone Info). Link given below:
https://play.google.com/store/apps/details?id=org.vndnguyen.phoneinfo&hl=en
11. Now click the Start button and wait until the ODIN shows PASS. The phone will now reboot.
12. To receive OTA updates, after installing the firmware, put the phone into Recovery Mode and wipe cache then wipe data/factory reset.
To go to the recovery mode press Power + Home + Volume up button. Now select ‘Cache Partition’ and wipe it. Then ‘wipe data/factory reset’ and reboot your phone.
You are done.✌ Post your comments below if you had flashed successfully or if you faced any issue or want anymore help. Let me know if you are stuck somewhere, I can provide you live support.
How to root the phone ?
Check here if you wanna root your android device Systemless-ly using Magisk
Stable custom ROM for S7 / S7 Edge with VoLTE
Check here if you wanna flash your phone with a stable Custom ROM that supports VoLTE
Those who have bought their phones overseas are now struggling to use Reliance Jio because they do not support VoLTE. And this guide will help you in making the Samsung phone to support VoLTE and Samsung Pay as well.
Before trying out this guide please make sure you have a 4G Samsung phone.
Let’s get started. 👍
1. Ensure the phone is charged over 60%. This process will wipe your entire data on the phone.
2. Check the model number of your Samsung phone.
Settings --> About --> Model Number
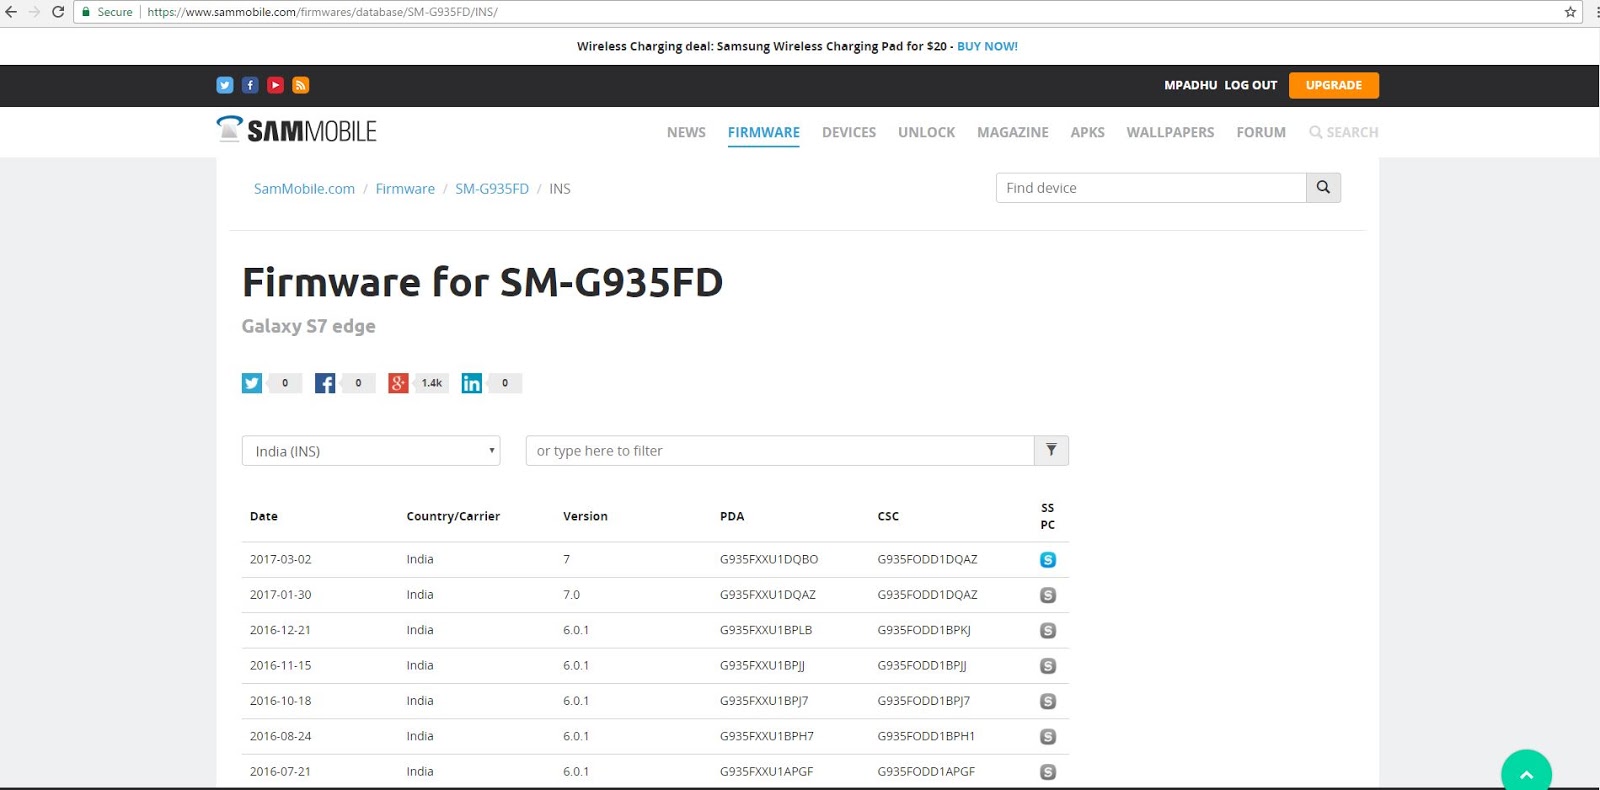
3. Go to the site https://www.sammobile.com/firmwares/ and insert your model number in the search bar and it will show all the available firmware versions for your model along with the country names. Check for INS or INU which indicates the Indian firmware. Download the latest Indian firmware for your model.
Below is the search result for the Samsung Galaxy S7 Edge (SM-G935FD) filtered by the Country India (INS). Click on the latest version and download the file.
4. Download the latest ODIN from http://odindownload.com/ or Here
5. Extract or Unzip the firmware file into a folder. Avoid using winrar as it can cause errors. Use 7zip instead.
6. Run/Open ODIN as Administrator
7. Put the phone in download mode. Shutdown your phone. Press Power + Home + Volume down. A screen appears asking you whether to continue or not. Press Volume up to continue. Connect the phone to the computer via a good USB cable. The ODIN should show the it has detected your phone.
8. From the extracted firmware put the below files in ODIN. Click on the buttons BL, AP, CP, CSC one by one and choose the respective files. The file to be chosen for BL will start with file name BL. The file to go for AP will start with the file name AP and so on as shown in the following image.
BL
AP
CP
CSC

9. Check the below options. (for this select Options tab).
F.reset time
Auto reboot
10. Here we are installing Indian country firmware from other country’s firmware so we need to change the System partition size. To do this select PIT file and the check the below checkbox. Note: PIT file is not required nowadays as it is already built-in the CSC file. So just check the below option as shown in the following image.
Re-partition

Note: If you are installing a multi CSC firmware, and your existing CSC is in that firmware, then DO NOT select Re-partition.
You can check if your firmware is Multi-CSC by installing this app (Phone Info). Link given below:
https://play.google.com/store/apps/details?id=org.vndnguyen.phoneinfo&hl=en
11. Now click the Start button and wait until the ODIN shows PASS. The phone will now reboot.
12. To receive OTA updates, after installing the firmware, put the phone into Recovery Mode and wipe cache then wipe data/factory reset.
To go to the recovery mode press Power + Home + Volume up button. Now select ‘Cache Partition’ and wipe it. Then ‘wipe data/factory reset’ and reboot your phone.
You are done.✌ Post your comments below if you had flashed successfully or if you faced any issue or want anymore help. Let me know if you are stuck somewhere, I can provide you live support.
Important Posts
How to root the phone ?
Check here if you wanna root your android device Systemless-ly using Magisk
Stable custom ROM for S7 / S7 Edge with VoLTE
Check here if you wanna flash your phone with a stable Custom ROM that supports VoLTE


